FMS F3A EXPLORER
Do you like flying aerobatics? FMS have developed an excellent, relatively small model for pilots who would like to fly serious precision aerobatics. It should be great for those who want to give F3A pattern aerobatics a try and for existing pattern pilots who would like a smaller and very convenient practice model.
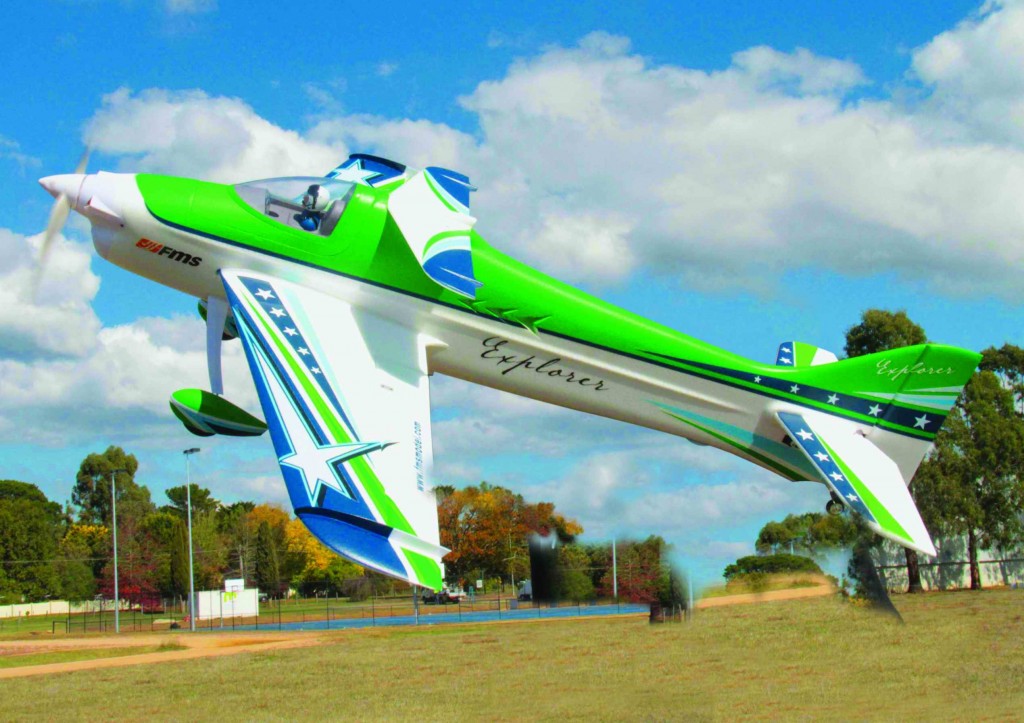
At just 1020 mm span and 1120 mm length, the F3A Explorer will fit, fully assembled, on the back seat of a car. Itís just the thing to pull out for a little aerobatics when the opportunity presents itself. The F3A explorer certainly looks the part. It has the lines of a contemporary pattern model with its swept wing, long fuselage, large tailplane and a canalyzer. Whatís a canalyzer? Well, itís a little wing thatís mounted above the main wing, designed to improve the aircraftís performance. They also look cool. Not that you or I, good reader, would be influenced by this.
My F3A Explorer came in a good strong box with a well-engineered foam insert that gave excellent protection to the enclosed model. FMS claim that the Explorer can be assembled in one hour and this seemed reasonable as there was nothing much to do during the assembly. The wings, tail-plane halves, canalyzer and undercarriage are held on by screws. A single screw joins the two elevator halves. The aileron, elevator and rudder linkages need to be fitted. These incorporate some very nice ball-links which, along with the installed good quality servos, give very precise control.
I have to say that I was very disappointed with the instructions. They have many errors and omissions. They advise fitting the canalyzer early in the assembly, almost guaranteeing that you will break it while working on the rest of the model. The pictures supposedly showing how to fit the aileron horns and linkages in fact show the rudder. There are no pictures of the aileron linkages. The channel numbers for the servo leads are correct for Futaba and Hitec radios but are wrong for JR, Spectrum and other radios. Thereís no reference to these differences in the text. Thereís nothing about securing the tailplane halves to the fuselage but this is essential. I found some screws with the elevators horns and linkage that seemed the right size to fit an empty hole on the underside of each tailplane. The instructions say nothing about the need to secure the two wing joining rods, so that they protrude an equal distance into each wing half. They are not otherwise retained and can easily move so that most of their length is in one wing panel with little in the other. I used a spot of glue to prevent them moving. And so it goes. Not good enough FMS writing team! The model development engineers have produced a really excellent aircraft that is let down by its instruction manual.
The FMS F3A Explorer comes as a plug and play model. You need to provide your own transmitter, receiver and battery. I installed my receiver using some self-adhesive Velcro. With all aircraft, having the centre of gravity (balance point) located correctly is very important. With a pattern aircraft, CG position is particularly critical for best performance. There is a whole page of the Explorer instructions devoted to setting the centre of gravity to the supposedly correct positon. ITíS WRONG! The specified position is 95 mm behind the leading edge of the wing. To my eye, this looked to be way too far forward and my CG calculations confirmed this. When I used a 3S 2200 mAh battery as recommended, the Explorer needed 125 grams of lead in the nose to get the model to balance as specified. This couldnít be right. I checked the FMS website to see if there had been any modification to the recommended balance point but it was still stated as 95 mm behind the LE. Putting! the CG too far back can lead to a dangerous and uncontrollable model but I was confident that the 95 mm figure was a grave error in the instructions. I balanced my Explorer 115 mm behind the leading edge for my maiden flight. I adjusted the direction and travel of all the control surfaces and set the recommended exponential on ailerons, elevator and rudder. I fitted the prop, refitted the canalyzer that I had removed during assembly, checked the direction of rotation of the motor and was ready to hit the flying field. It had taken me nearly 3 hours to get the model ready due to the poor instructions.
AT THE FIELD
After one last pre-flight inspection, I taxied the model out and lined it up for its first take-off. Holding a little up-elevator, I steadily advanced the throttle. The aircraft tracked straight, helped no doubt by its long fuselage, and lifted off long before I reached full throttle. Within seconds I felt very comfortable with the F3A Explorer. The controls have a very precise and solid feel about them. Some up elevator trim was required to get the model flying straight and level. After lots of close passes for the photographer it was time to test out the Explorer. Rolling the aircraft inverted revealed that it needed quite a bit of down elevator to maintain level flight. If the CG is located just right, a good aerobatic model will require little or no down elevator to maintain inverted flight. Clearly the balance point was still too far forward, in spite of being way behind the specified location. Next I checked the thrust-line of the motor by doing first a vertical climb and then a throttled-back, vertical dive. When going straight up at full-throttle the F3A Explorer pulled very slightly towards the canopy. On the vertical down line it did the same. This was further indication of a forward CG position.
Enough of this technical investigation; it was time for some aerobatics, even if the model wasnít properly set up yet. Yes, its good fun. The explorer is very capable. Loops could be as large as I wanted and were easy to keep straight. Stall turns were pretty and the Explorer could easily be persuaded to come to a stop and pivot around its centre of gravity before diving back down in the opposite direction to its climb. Cuban-eights and reverse Cubans were easy and looked great. I tried rolling the model into knife-edge and applying a little top rudder. Yep, the rudder is very effective and not much is required to hold knife edge. A slight pull towards the canopy was evident; again probably due to a forward CG. Four-point rolls were easily flown and slow rolls could be made as slow as I liked; easily stretching to the whole length of the field. Although my aerobatic skills were a bit rusty, the F3A Explorer was making me look good.
After the first test flight I went home a fitted a little lead to the rear of the fuselage to move the CG back to 120 mm behind the leading edge. The next flight revealed that the Explorer flew even better when balanced here. I put in a couple more very enjoyable flights. It really is a nice-flying aircraft. I am going to experiment next with the CG at 125 mm where I suspect that this will be close to perfect for me. If you are experienced, I recommend that you start with a CG position of 120 mm behind the leading edge. If this is your first truly aerobatic model, start at 115mm back. If you use recommended 95 mm CG your aircraft will be a real dog to fly so I recommend you disregard the incorrect instructions and go with my recommendations.
CONCLUSIONS
The F3A Explorer is a great aircraft that has the potential to fly precision aerobatics very well. Hopefully, if you are experienced enough to fly this aircraft, you will also be experienced enough to assemble it correctly in spite of the instructions. If you position the CG correctly youíll love the Explorer. If you follow the manual you will be very disappointed.